Category: Uncategorized

How to use Cricut for quilting
-->

Cricut machines are a popular tool for quilters, as they allow for intricate cuts and designs. If you’re new to using a Cricut machine for quilting, here are some tips to help you get started.

Fabric cutting with a Cricut machine is a precise and easy way to cut fabric for quilting. You can cut multiple layers of fabric at one time, which is a real time saver. Plus, the cuts are always accurate and clean. The key to successful quilting with a Cricut machine is to use the right blade and follow the manufacturer’s guidelines for fabric thickness.

Quilting is a centuries-old craft that has been traditionally done by hand. However, with the advent of modern technology, quilting can now be done with the help of a machine called a Cricut.

If you’re new to quilting, or just new to using a Cricut machine, you may be wondering how to get started. Here are a few tips to help you get the most out
of your Cricut machine when quilting:

  1. Choose the right Cricut model. There are a few different models of Cricut machines, so make sure to choose one that is best suited for quilting, which is the Cricut Maker that works with the rotary blade.
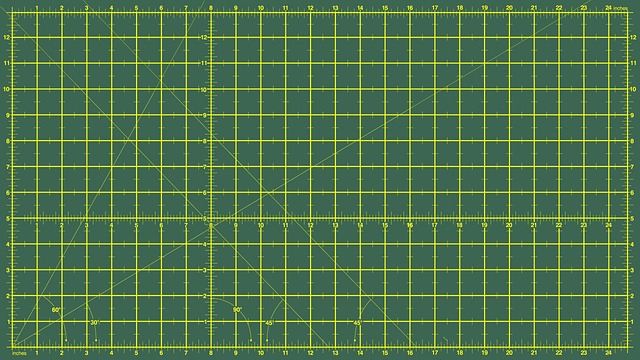
  2. Choose the right tools. Cricut machines come with a variety of different blades and mats, so it’s important to choose the right ones for the material you’re working with. For quilting, we recommend using the rotary blade and a self-healing pink Fabric cutting mat.
  3. Pre-cut your fabric. Before you start cutting your fabric with your Cricut, it’s important to pre-cut it into manageable pieces. This will make it easier to work with and will help prevent wasted fabric.
  4. Get the right materials. In addition to the Cricut machine, you’ll need quilting fabric, batting, and thread.
  5. Cut your fabric. Once you have all of your materials, you’re ready to start cutting your fabric. The Cricut can cut a variety of different shapes, so experiment to see what you like best.

How to use Cricut for quilting
  1. To cut fabric for quilting with a Cricut Maker and Cricut Rotary Blade, first gather your materials.
  2. You will need a cutting mat, rotary blade, and fabric.
  3. Choose the size and shape of fabric you want to cut, and then position it on the cutting mat.
  4. Load the cutting mat into the Cricut Maker, and then select the rotary blade from the menu.
  5. Adjust the blade depth and speed according to the type of material you are cutting.
  6. When you are ready, press the start button and watch the Cricut Maker cut your fabric.

Best Cricut vinyl for quilters

If you’re looking for the best Cricut vinyl for decorating fabric quilts, then heat transfer vinyl, or HTV vinyl, is the way to go.

This type of vinyl is specifically designed for use with fabric, and it’s easy to cut and apply using a cricut machine and an iron.

Plus, HTV vinyl comes in a wide variety of colors and patterns, so you can find the perfect look for your quilt.

How to decorate your quilts with HTV vinyl

If you’re looking for a way to add some personalization to your quilts, you may want to consider using Cricut vinyl.

This material can be used to create custom designs that can be applied to your quilts.

For example, to add names, initials, or other words to quilts. It can also be used to add images or other designs.

Best of all, Cricut vinyl is easy to use, can be found at most craft stores, and is available in a variety of colors.

How to cut and apply HTV vinyl to your quilts

Cutting HTV vinyl with a Circuit is a quick and easy way to add personalization to your quilting projects. Here’s a step-by-step guide:

  1. To cut HTV vinyl with a Cricut machine, first load the vinyl onto the cutting mat.
  2. Make sure the vinyl design is mirrored before cutting.
  3. Then, select the ” Iron on vinyl ” setting on the Cricut machine.
  4. Choose the desired size for the vinyl design.
  5. Finally, cut the vinyl using the Cricut machine.
  6. Weed the vinyl to remove any excess material.
  7. To apply the HTV vinyl to fabric, first preheat the fabric.
  8. Then, position the vinyl on the fabric.
  9. Place the vinyl onto your fabric, making sure to smooth out any wrinkles.
  10. Place a piece of parchment paper over the vinyl, then use a hot iron or a heat press to press the design onto the fabric.
  11. Remove the parchment paper and allow the design to cool.
  12. Quilt as desired!

Categories: Uncategorized

How to create quilted nail designs

-->

If you love quilted designs and gel nail polish, then you’ll love this tutorial on how to create a quilted nail design using gel nail polish! This design is perfect for any occasion, and is surprisingly easy to create.

All you need is a few colors of gel polish, a dotting tool, and a little bit of patience.

Follow these simple steps and you’ll have beautiful quilted nails in no time!

Best gel nail polish for quilted nail designs

This type of design is created by either using one color and embossing the lines on it or using different colors of gel nail polish to create a quilted or patchwork-like effect.

To get started, you’ll need to choose one favorite hue or 3-5 colors of gel nail polish that you want to use for your design.

If you’re not familiar with gel nail polish, it’s a type of polish that is cured under a UV or LED light. Gel polish is thicker than regular nail polish and tends to last longer, making it a great option for those who want their nail designs to last.

When it comes to choosing the best gel nail polish to create a quilted nail design, there are a few things you’ll want to keep in mind.

  1. First, you’ll want to choose a gel nail polish that is a solid color. This will make it easier to create the quilted effect.
  2. You’ll also want to make sure that the gel nail polish you choose is thick enough to create the quilted effect.
  3. The color of gel polish you use will affect the overall look of your nails. If you want a more subtle quilted look, you may want to choose a nude or light-colored gel polish. If you want a more dramatic look, you may want to choose a dark-colored gel polish.
  4. Finally, you’ll want to choose a gel nail polish that is easy to work with.

How to do it step-by-step

A quilted nail design is a timeless classic that can be achieved using gel nail polish. Here is a step-by-step guide on how to create this look at home.

  1. Start by applying a base coat of gel nail polish to your nails.
  2. Once the base coat is dry, apply a coat of gel nail polish in your desired color.
  3. Next, apply a second coat of gel polish.
  4. However, before this layer is dry, to create the quilted effect, use a dotting tool or a toothpick to draw crossing lines from the center of each nail outwards.
  5. Once that polish layer has been cured, use a dotting tool or a toothpick to create small dots on your nails in a contrasting color in places where the lines cross.
  6. Finish off the look by applying gel top coat.
  7. Cure your nails under a UV lamp.

Some tips

Quilting is a popular motif in nail art, and there are many ways to achieve the look. Here are a few tips on how to create a quilted nail design using gel nail polish.

  1. To start, choose a base color for your nails. A light color will make the quilting design stand out more, while a dark color will give a more subtle look.
  2. The look is created by using a dotting tool or a toothpick to emboss quilting lines on your nails.
  3. You can make the quilting lines as thick or thin as you like, and you can also vary the spacing between them.
  4. To add some interest, you can also include different colors in your quilting design.
  5. Once you’re happy with the design, apply a layer of gel top coat to seal it in.

Categories: Uncategorized

Best sewing tables for quilters on the market

-->

Are you looking for sewing tables for yourself? Are you wondering which one will be the best for you? If you are searching for the best sewing table 2021, this is the review you need to check.

Sewing is an essential part of our lives, but also a demanding one. Most of us would agree to the fact that sewing is the kind of hobby that requires you to spend a lot of time in the room where you work.

Thus, the best sewing table for you needs to be the one that will allow you to work comfortably in a room that is close to home, so you can also go there for help if you need it.

You should know what features you are looking for in the table and the rest is history. There are so many sewing tables that can be found online. If you are in doubt about what to buy, the following article will help you to choose a table that is the best one.

So let’s have a look at the top 10 best sewing table 2021 that you need to know about.

Top 10 best sewing tables

1. Brother PE2088E sewing machine stand

You may be familiar with the brand Brother, as it is an iconic name in the sewing industry. We have selected this sewing table for the first place, which features some really unique features that are not available in any other sewing tables.

First, it is not an ordinary table, but an industrial-grade one. It has a very sturdy frame that can hold the sewing machine for up to 20 lbs, so you will be able to sew with ease and comfort. The material used in the frame is solid wood.

Its top is very sturdy and you can rest your laptop and other devices on it as well. The best thing about this model is that it is compatible with all the Brother machines from the past and the future.

However, you must check that you are buying it from a reputable store, as some resellers will sell the same model with different specs. That is why we only recommend this model.

2. Brother PE2312E sewing machine stand

Another high-quality Brother sewing table that comes in the top 10 list is the PE2312E model. It is a simple yet very useful sewing table that also has a good frame that can support up to 35 lbs.

It is built with steel, so you will get the most durable sewing table. It comes with a strong wood top, so you can rest your laptop on it.

This sewing machine stand also comes with a very smart design and it is also a good option if you need a simple sewing table.

The only disadvantage of this model is that it has a very limited capacity. If you are looking for a simple and cost-effective sewing table, you may be disappointed with it.

However, Brother PE2312E is a perfect choice if you are looking for a good sewing table for a lower budget.

3. Sew Ready Hobby Sewing Table

The third place belongs to the Sew Ready Hobby Foldable Sewing Table. The sewing table has a very simple design, but is still a good option if you are on a low budget. It has a sturdy frame that is suitable for up to 35 lbs.

It is designed to fold, so you can take it anywhere you need it, if you are traveling a lot. This sewing table is a good choice for sewing classes.

This table also comes with a very smart design, so you will be able to find a good place for your sewing machine. However, it is not very strong, so you need to be careful with it.

4. Jaxpety Wood Folding Sewing Craft Table

If you are looking for a simple sewing table that is also foldable and can also work in a small room, this sewing table will be the one that you are looking for. This sewing table has a wood frame that is suitable for up to 20 lbs.

It can be folded, so you can take it anywhere you need. It comes with a very smart design, so it is a good choice for sewing classes.

The only drawback of this sewing table is that it is a bit heavy, so you may not be able to move it easily.

5. Bauhaus DIY Sewing Craft Table

The fifth place belongs to the Bauhaus DIY sewing craft table. It is an interesting choice that has been specially designed to allow you to make all kinds of craft projects and sewing.

It comes with a very nice wood frame that can support up to 35 lbs. It also comes with a very smart design, so it will be easy to move the table from place to place.

This is a good choice if you need a sewing table in a small room. However, it has a few drawbacks, as it is not easy to fold.

6. Sew-Matic Sewing Craft Table

If you are looking for a small, light, and affordable sewing table, you should take a look at the Sew-Matic sewing craft table. This sewing table has a very simple design, but it is a good choice for sewing classes.

It can hold up to 50 lbs. However, this sewing table has a very narrow table surface, so you need to be careful if you plan to sew big projects.

If you need a cheap sewing table, you should try it, but you must keep in mind that you may have to be a bit careful.

7. Craft Room Furniture Sewing Table

If you need a sewing table with a very small size, this is the sewing table for you. This sewing table has a very simple design that is made of sturdy aluminum. It can hold up to 35 lbs.

It can also be folded, so you can take it anywhere. This is a good sewing table that is ideal for sewing classes.

8. Jaxpety Wood Craft Table with Trolley

This sewing table has a very simple design, but it is still a good choice for sewing classes. The frame of this sewing table is made of steel, so it will be very durable.

It can hold up to 20 lbs. It has a nice design and comes with wheels, so it can be moved very easily. You can easily place your sewing machine on it, so it will be convenient for you.

It is also a good choice for sewing classes, so you will not have to worry about carrying your sewing machine.

9. Woodcraft Furniture Sewing Craft Table

This sewing table is a very useful one that has a simple design. It can hold up to 35 lbs. However, it does not come with wheels, so you will need to place your sewing machine on it.

It can also be folded, so you can take it anywhere. This is a great sewing table if you need to place your sewing machine on a desk and you need to move it from place to place.

This is a good choice if you need a sewing table that can hold a lot of weight.

10. Craft Room Furniture Sewing Craft Table

This sewing table is also a very useful one that can hold up to 50 lbs. This is a good option if you need a sewing table that can handle a lot of weight.

It can also be folded, so you can take it anywhere you need it. This sewing table has a very simple design, but it is still a good option for sewing classes.

It has a nice and sturdy frame that will hold your sewing machine for many years. You can also place your laptop on it, so it is convenient for you.

Conclusion

When you are buying a sewing table, you should consider many different factors. It is not that easy as you think. It is a big investment, so you should take a lot of time to do research and find a sewing table that is good for you.

There are a lot of sewing tables that are available in the market, but the following article will help you to find the best one.

Categories: Uncategorized

Best cutting mat for quilters

-->

I’ve rounded up the best mats on the market so you don’t have to look further.

Quilting and fabric crafts require the proper tools, and there’s no better place to start than a quilting cutting mat. Quilters and fiber artists can spend hundreds on a set of tools that are designed specifically for their needs, but not all fabric- and sewing-friendly materials and accessories come at a price. Fortunately, many of them can be found for a reasonable price at the local dollar store. In fact, most of them are made specifically for cutting and sewing, and they are designed to make quilting and fabric crafts that much easier. We have done the research and testing, and now we are offering our favorite quilting and sewing mats to help you do the same. We’ve tested everything from the most affordable, like plastic foam mats and those that are better than the rest, to the most well-regarded options that you can afford. Read our reviews and take our quiz to find out which are the best.

Why are cutting mats important?

If you’ve ever tried cutting fabric without a cutting mat, you’ll know that it’s a pain in the neck. Fabric is tricky and sometimes sharp corners can tear your fingers, but that doesn’t mean you have to suffer through this pain. Instead, you can use a quilting cutting mat to ensure the fabric stays nice and safe. A quilting cutting mat has a layer of non-slip rubber, or fabric-friendly material, on top of a thick layer of foam. The foam absorbs the impact from fabric, and then the rubber on the surface of the mat keeps your hands safe. This is the best cutting mat for quilters. If you sew or quilt, you will absolutely want this quilting cutting mat.

Best cutting mats for quilters – Best for beginners

The best cutting mat for beginners is the Dritz Deluxe Non-Slip Quilting Mat. It is perfect for beginners because it is made for quilting and cutting and has a thick foam layer on top of a rubber backing. The mat itself is non-slip and will not slide on fabric. It also has a rubberized surface that keeps your hands safe from fabric-related accidents. This mat is the perfect beginner mat because you won’t have to worry about damaging fabric or your hands while cutting.

If you are interested in buying this mat for beginners, the Dritz Deluxe Non-Slip Quilting Mat is the best cutting mat for beginners. This mat is designed to be easy to cut with, making it the perfect cutting mat for beginners.

Best cutting mats for quilters – Best for more advanced users

The best mat for more advanced users is the Dritz Quilting Pad. It is ideal for quilters who want the best, and it has the best rubber on the market. This rubberized mat will not slip or slide on fabric. It has a thick foam backing, and a non-slip rubberized surface that will not damage your quilt or other fabric projects. This is a perfect cutting mat for quilters that want a cutting mat that will not slip and will last for years.

If you want a mat that will last you for years, is great for beginners, and also fits in your sewing machine, the Dritz Quilting Pad is the best mat for more advanced quilters. This mat is made specifically for quilters, and it is ideal for beginners and more advanced users. This cutting mat has a thick foam backing that will absorb impact. The Dritz Quilting Pad has a non-slip rubberized surface that will not damage your fabric.

The best mat for quilters that are looking for a cutting mat that will fit in the sewing machine and lasts for years is the Dritz Quilting Pad. This is the ideal mat for quilters who want the best, a mat that will last for years, and is made for quilters. This mat is perfect for beginners, and more advanced quilters.

Best cutting mats for quilters – Best for larger quilts

The best quilting cutting mat for larger quilts is the QuiltMaster Non-Slip Quilting Mat. It is best for larger quilting projects because it has a larger surface area, so you can cut bigger and thicker fabrics. The quilting cutting mat will fit on your sewing machine and has a non-slip rubberized surface on top of a thick foam backing. This cutting mat is perfect for larger quilting projects because it will absorb impact and the foam is perfect for larger projects. If you are looking for a quilting mat that is big and has a thick foam backing, the QuiltMaster Non-Slip Quilting Mat is the best cutting mat for large quilting projects.

Best cutting mats for quilters – Best for beginners

The best cutting mat for beginners is the Dritz Deluxe Non-Slip Quilting Mat. It is perfect for beginners because it is made for quilting and cutting and has a thick foam layer on top of a rubber backing. The mat itself is non-slip and will not slide on fabric. It also has a rubberized surface that keeps your hands safe from fabric-related accidents. This is the best cutting mat for beginners because you won’t have to worry about damaging fabric or your hands while cutting.

Categories: Uncategorized

How I organize my quilts

-->

When I start to sew a quilt I have two main objectives in mind. First, I want to finish the project. This means I need to sew it out the way I want it. Second, I want it to be a good looking quilt. When I sew the quilt top together I try to keep these two goals in mind, but in order to do this I have to be organized. If I don’t have a plan, then there is no way I can make sure that I accomplish my goals. If you’re like me and you sew quilts as you go, then it’s time to start planning your quilts a little better!

The first thing I like to do is decide where I’m going to store the quilt once it’s done. I also like to figure out how I’m going to use the quilt once it’s done. I usually like to make the quilt so that I can use it for several years. I also think it’s helpful to figure out who will use the quilt once it’s finished. When I make a quilt for myself I almost always label it with the name of who I made it for and the type of project it is. That way, if I do decide to give the quilt away or make it into something else, then it is less of a hassle to do it.

When I make a quilt for someone else I like to write that on the back. I think it’s really helpful to have someone write that on the back. I also write my name on the back if that is the person who is going to use the quilt. That way, I don’t have to worry if I give it to someone else or if I sell it and then decide I want to give it to someone else, I can be sure that it will be okay.

The second thing I like to do is to figure out what order I want to sew my blocks together. I have found over time that if I don’t plan that out carefully, I tend to end up doing more sewing than I would have had I planned.

When I sew together my quilt top I like to start with the center blocks, the corner blocks and then the sashing. Once I get through these blocks, I usually start with the borders. I also try to sew the blocks together in the same order every time. That way, when I am finished and I have all of my blocks sewn together, I can go through the blocks and make sure that each block is right.

Once I start to sew my quilt top together I like to get an idea of how big the quilt is going to be. I like to make sure that I have enough fabric in my stash to cover at least two quilt tops. If I don’t have a good idea of how big the quilt is going to be I tend to cut way too much fabric. So, once I know how big the quilt will be, I take that into consideration when I am buying my fabric.

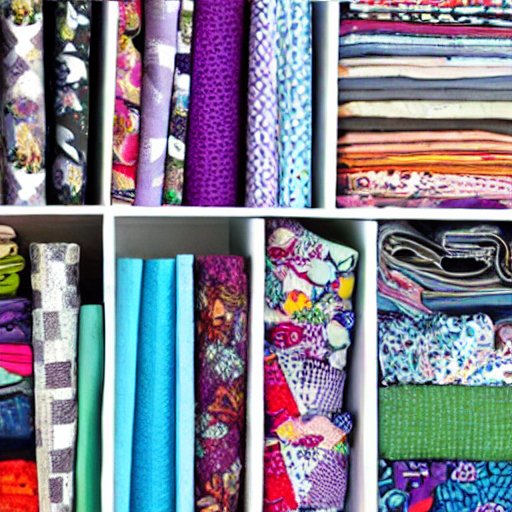
I have a couple of different ways that I organize my fabric. I have a box that I keep everything in. This is probably my favorite. There are several boxes in it. The boxes that are used for my quilt projects are always in the top box. The boxes are labeled with the name of the project and then the type of project. The boxes that hold all the fabric for any project are on the bottom. This way, when I need to pull fabric for the quilt project, I know that I have everything I need. I also like to keep my fabric in alphabetical order by color. That way, if I want to do a particular quilt project, I don’t have to sort through a lot of fabric to find what I want.

When I was first learning to quilt, I learned to sew a quilt top by following a pattern. This worked pretty well at first, but the only problem is that the directions don’t tell you when to stop. I think this is why the majority of quilters are organized in this way. Most of us just get in the habit of sewing the quilt top as we go. But, what this means is that we tend to sew all of our blocks together in order and then add the sashing and borders. I learned this way and it works for me, but I have found over time that it doesn’t always work for everyone. For those of you who sew quilt tops in a similar way, I hope you can understand where I am coming from.

I have been trying to break out of my habit of sewing quilt tops in the order I am going to sew them together and try to sew them together as I go. This is easier to do if I plan out my quilts a little more. So, in order to try this I need to make a plan and stick to that plan. This means that the blocks must be labeled and the order in which they are going to be sewn together.

Please share in comments how you organize your quilts.

Categories: Uncategorized

How I organize my quilting fabrics

-->

I love to keep everything together but it isn’t always possible. I have been asked to show people how I keep it organized. I would like to share that here in hopes of helping you with keeping your stash organized. I would like to know what works for you. I use all types of containers, bags, boxes, etc. But here are a few things that have worked best for me.

CUTTINGS BAG

I use a plastic grocery bag for this purpose. You can buy them at any grocery store for $1. I use one at a time and it holds all of my cuttings. I label it with a sticker that says “Cuttings”. I don’t care if my bag gets messy or dirty or what. I just throw it in the trash when I’m finished. I don’t label each item. Sometimes I do and sometimes I don’t. It is my choice.

SHOPPING BAG

I use a plastic shopper bag. This can be used to hold fabric as well. If you only have a few pieces of fabric to cut, you can cut them out of a plastic shopping bag.

CUTTINGS BOX

I use a plastic cuttings box from the hardware store. It holds all the cuttings from the previous week’s work. I label it with my fabric shop and date. If I do a little shopping in that week, I put my labels on the plastic box and stick it in my cuttings bag.

SEWING BAG

I use a plastic sewing bag. I bought this one from a sewing supply store. I use this to hold all the pieces that I am going to sew in one day. I label it and keep my machine oil in it. I also like to keep my machine needles in there and some sewing thread. I can just use a plastic zip top bag if I want to.

TRAY

This is a plastic covered cardboard box. I have one in each room. One is for fabric, one is for sewing, and the last is for buttons and trims.

SHEET BAGS

I use a box from the grocery store that I bought to hold my paper plates, paper cups, etc. I put my fabric in this bag and put the zipper in it. If you use these, you won’t have to buy a separate bag for your fabric.

I would love to hear how you organize your quilting fabric.

Categories: Uncategorized

Innocence Block

-->

When I began quilting, I couldn’t imagine making more than one quilt at a time. I couldn’t imagine making one of a kind quilts for myself. I’ve made many quilts over the years but very few have been one of a kind. My current favorite quilt pattern is a quilting variation of a traditional block called an ‘Innocence’ block. I have several in my collection. I like them because they are a modern, abstract interpretation of the block. In addition to this quilt, I have two others in the making, one is also a variation of the Innocence block. They are a joy to sew and I enjoy seeing them come together.

Innocence Block

My first Innocence Block

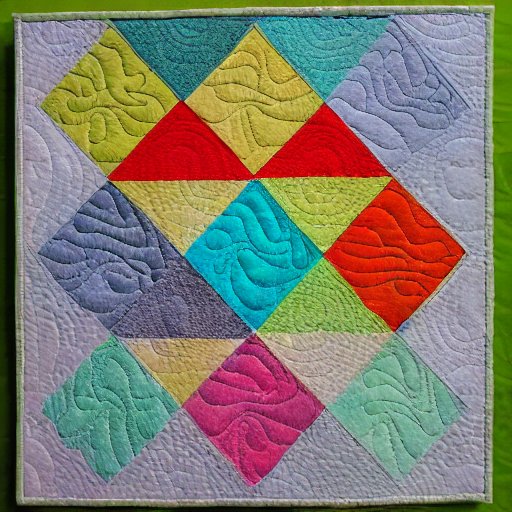
I’ve made several Innocence Blocks but the one shown in the pictures above is my first. It is one of my favorites. The reason I love it so much is because I used the exact same fabric for the entire top. I like the simplicity of this quilt.

The pattern is from the Quilter’s Treasures book from C&T Publishing.

To make this quilt, you must cut the fabric squares from the pattern and sew together using a simple block. There are many possibilities for the size, orientation and design. It’s the perfect quilting pattern to learn the art of quilting with. If you have more Innocence blocks in your collection, share them with the world.

I don’t use a pattern for my quilts. Instead, I design my quilts after the block. I’ll have ideas floating around in my head about what I want the quilt to look like. Then, I’ll start sketching it out with paper. I like to start with the blocks I’ve already made. In my sketching phase, I’ll sketch the block as it’s oriented on my design wall and decide where to place the blocks, if the blocks need to be inverted or rotated.

In my sketching phase, I usually make a large copy of my design on a piece of paper. I then draw around the block using the paper as a guide.

When I’m happy with my sketch, I mark the center of the block and make a list of all the fabric that I’ll use in my top. I also make a list of the colors and fabrics for the blocks to the left and right of the center.

My finished Innocence Block

When I make my first block, I always cut the fabrics so that I have a minimum of waste. I find it very satisfying to sew one square at a time and have it come together perfectly without cutting or trimming.

Then, when I’m finished with one block, I’ll cut it to half or quarter size. I often use this method of cutting when I’m designing. This allows me to look at the block with fresh eyes. I’ll then sketch out the next block. I’ll continue making this way until I’m happy with the design.

In this Innocence block I used a mixture of solids and prints, it was quite easy to do. I started with the prints and added the solids as I added them. I really enjoy this style of quilting. The color range of my fabric is limited by the colors available from my stash. This Innocence block is a great design to sew and I’ll sew a few more of these before I move on to more complicated designs.

Sewing the block together

Innocence blocks are not a difficult pattern to sew. As I said, it’s a simple block that uses just a few fabric selections. Most blocks use a similar number of fabrics.

For this quilt, I used a fabric called ‘Nora’ by Moda. It’s an interesting fabric and I really like the texture of it. I was happy with the fabric as it was. I had a nice range of colors and had just the right amount of prints and solids. I added some green, orange and purple solids but not a lot. I wanted to keep the color balance neutral.

The blocks look like this when they’re sewn together.

I chose to quilt my quilt top in a vertical strip design. If I’d made this quilt with a horizontal design, it would have looked like a ‘wall hanging’. I don’t like ‘wall hanging’ designs in my quilts, so I prefer to quilt the top in the opposite direction. I prefer to have a more modern, geometric look to my quilts, and vertical designs fit better with the modern trend in quilting.

Categories: Uncategorized

New quilt ideas

-->

I have a few new ideas for quilts in the works, so hopefully I will be able to post about them. The current WIP is a hexagon quilt with a sashing between the hexagons, and the sashing is a strip that starts at the long side and turns 3/4 of the way around the quilt, so the sashing wraps around all six sides, and then the sashing and hexagons meet in the center.

I made it for my mother-in-law, but I don’t want to say anything yet. I am using leftover batting from a quilt I made and I want to keep the batting a surprise.

I love making hexagons and I used the hexagons from the quilt I made for her, and then the sashing is another set of hexagons, that match up with the hexagons on the other end. They are also offset by half a hexagon, so they will meet up in the center. It is really big and will have a lot of batting, but it is such a pretty design! I’m very proud of it!

I am working on a couple of projects for myself. One is a quilt I want to make for my son for his 20th birthday. He wants something with a lot of detail, and the one he liked the most on Ravelry had a lot of diamonds in it. I have all of the diamonds cut out and ready, and just have to put them together in the correct pattern.

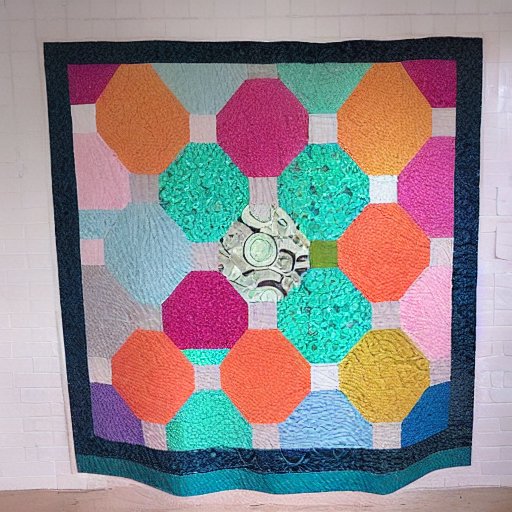
Another project is a wall hanging. I am using a pattern I made to make a wall hanging. It is a design that I made a few years ago for a block of the month, but I didn’t have enough fabric so I decided to make a wall hanging out of it. It is very blocky and I like it that way!

I also made a new bag. It’s a little too big for a purse but a little too small for a messenger bag, but it fits my iPad very well. It has room for things, and I like the shape of it.

I am just getting things organized in my studio. I have made a lot of things since I last posted, and I have to sort out what I have made, what is still in the planning stages, and what is finished.

I still have a lot of fabric that I would like to use, and am in the process of getting those cut out and sorted. I also would like to get all of the supplies that I have been hoarding out of the garage and ready to use.

So I am just sitting around waiting for the next adventure!

I would love to hear about what you are working on right now, and if you have any other tips for getting organized.

Categories: Uncategorized

How I organize my quilting books

-->

I’ve been quilting for a while now and I’ve always had a large library of books with instructions and fabric that I would like to use. I would like to make sure that I have a way of keeping track of these books so that I know where they are and what I need to make use of them.

It looks like it’s a lot of books and I would like to have a more manageable way of keeping track of them.

The way that I organize my books is by size. By keeping them in groups of colors, prints and shapes. Then I group them by category, whether they be for quilting or scrapbooking, which are often mixed in together.

It’s easier for me to keep them in this order because I have the largest categories on the top and work my way down to the smaller categories.

I also use a label maker that allows me to put my fabric on the back. I will label them by shape or color and then also place them by size so that I know where they will fit. I do this because it will make it easier for me to find the specific fabric when I am looking for it later.

I have a small stack of books in my stash box that are more on the scrappy side and they are the smaller sizes. If I need a large piece of fabric for a quilt, then I will also check out these smaller books in order to get the fabric that I need to complete my quilt.

You are using a very organized method for organizing your fabrics, which is great. In my books, they are organized by print, shapes, sizes, fabric and quilting books.

I also put my fabric samples in boxes to see which fabrics I want to have in my scrap basket. That way, I know which fabrics go together best.

How do you keep your books and fabrics organized?

Categories: Uncategorized

Best quilting courses

-->

When it comes to quilting you have a lot of choices available. They range from traditional piecing to free-motion. Free-motion quilting is an advanced skill and will require a lot of practice before you will be happy with the results. This is something I would recommend having a book or a video available that can be watched repeatedly.

You could also take a lesson at your local quilt shop and find an experienced quilter who can teach you a lot of the techniques you will need.

In this article we will look at some basic quilting courses and how you can learn quilt making with them.

Quilting 101

Before you get started, it is always a good idea to go through a quiltmaking 101 course. It will help you to understand the basic techniques and terminology. Quiltmaking 101 is available in lots of different forms. There are books, video, and online courses to choose from.

The following topics will be covered:

Quilting Terms

Making Fabric Quilts

Quilting and Free Motion Quilting

Machine Quilting Basics

Quilting Basics

The Quiltmaking 101 Course

Quilting 101 is a free course and available from quilting101.com and quilting101.com/quilting101. Quilting 101 can be watched online or downloaded as a PDF file. In addition to the online course, you will be sent a link to download the lesson plan as a Word file.

The Quilting 101 course takes a step by step approach to teaching you the skills you will need to quilt your own quilts. It covers a variety of quilting topics in an enjoyable and easy to understand way. There are five videos with a range of topics and around 25,000 words of writing to read through. It should take around five hours to complete.

The Quilting 101 Course is available for the next five months. You will receive the course, PDF and Word documents. You will also receive five weekly newsletters to keep you up to date with the course.

If you need to learn the basics of quilting but don’t want to invest the time and money it will take to buy a course and take a lesson, there is an option for you.

If you are interested in taking the course you can visit the website www.quilting101.com to register. The site contains lots of helpful links, information and videos about quilting and quiltmaking.

Learning to Quilt – An Online Course

Learning to Quilt is a free online course for beginners. You do not need any previous experience with quilting. This is a great way for you to get started if you don’t want to spend a lot of money on books or a course.

Learning to Quilt is a step by step approach to learning how to quilt and includes the following:

Getting Started

Preparing Fabric

Making Fabric Quilts

Quilting and Applique Basics

Hand Quilting Basics

Machine Quilting Basics

Embroidery Basics

The course is broken down into 8 lessons and includes the following:

Introduction to the course

Lesson 1: Getting Started

Lesson 2: Preparing Fabric

Lesson 3: Making Fabric Quilts

Lesson 4: Quilting Basics

Lesson 5: Hand Quilting Basics

Lesson 6: Machine Quilting Basics

Lesson 7: Embroidery Basics

Lesson 8: Applique Basics

This free course is a great introduction for beginners and you can get a lot of useful tips and tricks from the online course.

You will receive an email containing information on the course after you register and if you follow the instructions you should be able to finish the course in about 8 hours.

Quiltmaking 101 and Quilting 101 on DVD

If you are looking for a more in-depth course, it is also possible to buy Learning to Quilt and Quilting 101 on DVD.

Quiltmaking 101

Quiltmaking 101 is the main course. It includes a DVD and PDF. You can buy the DVD and PDF separately or get the DVD plus the PDF and instructions. The DVD is available for £13.99 and the PDF and instructions is £7.99. The DVD is around 4.5 hours long and the instructions are around 3 hours long.

The Quiltmaking 101 DVD and PDF can be purchased through quiltmaking101.com.

Categories: Uncategorized